Check-in Management
Check-in Management allows you to see your check-ins, view the data associated with the check-ins, and enable or disable check-ins.
From this page, you can easily see the number of check-ins that have been sent for each employment milestone as well as the number of responses received. This is a great way to verify that check-ins are being sent. From this page, you can filter by location or role.
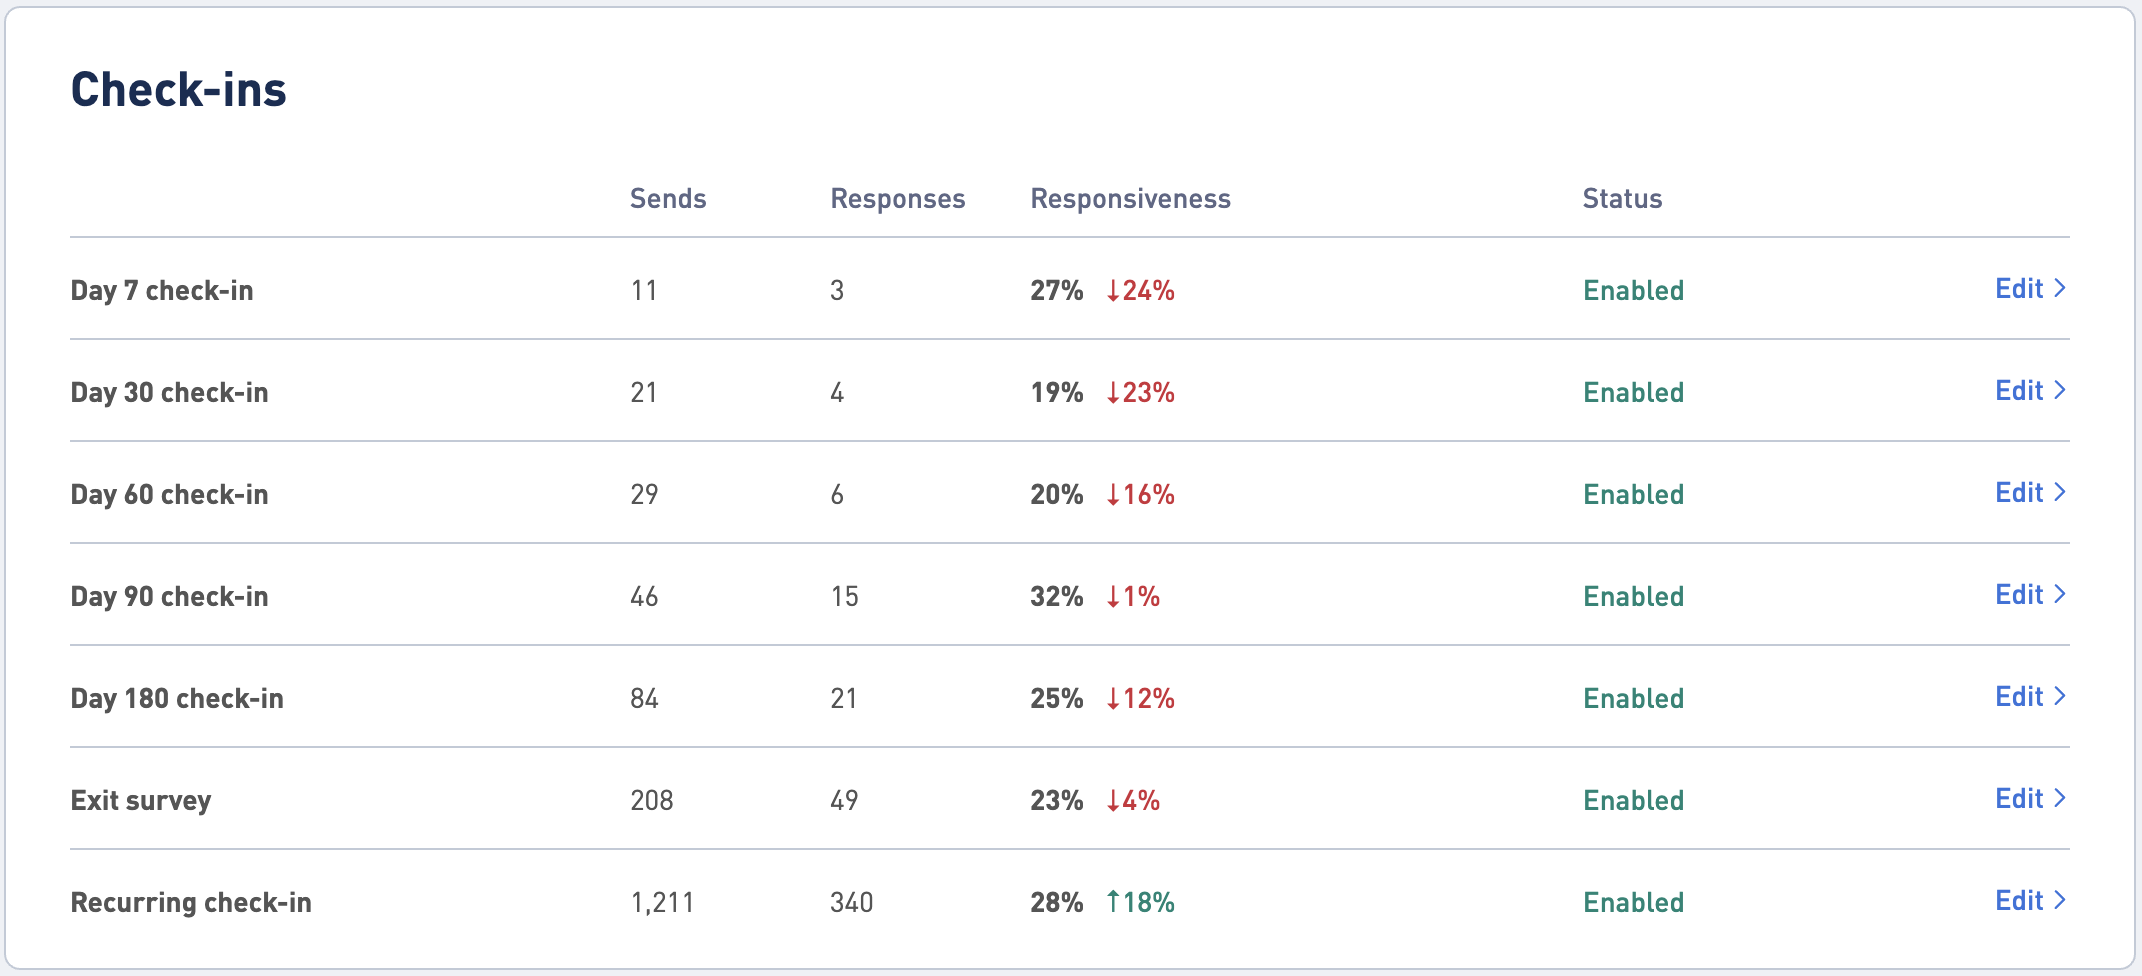
- The 'Sends' column includes the total number of check-ins that have been sent.
- The 'Responses' column includes the total number of responses received for each check-in.
- The 'Responsiveness' column represents the total number of respondents divided by the total number of recipients. The second number with the associated arrow is the current period compared to the previous period by percent change. If the 90-day filter is selected, this is the last 90 days compared to the previous 90 days. If the 180-day filter is selected, this is the last 180 days compared to the previous 180 days.
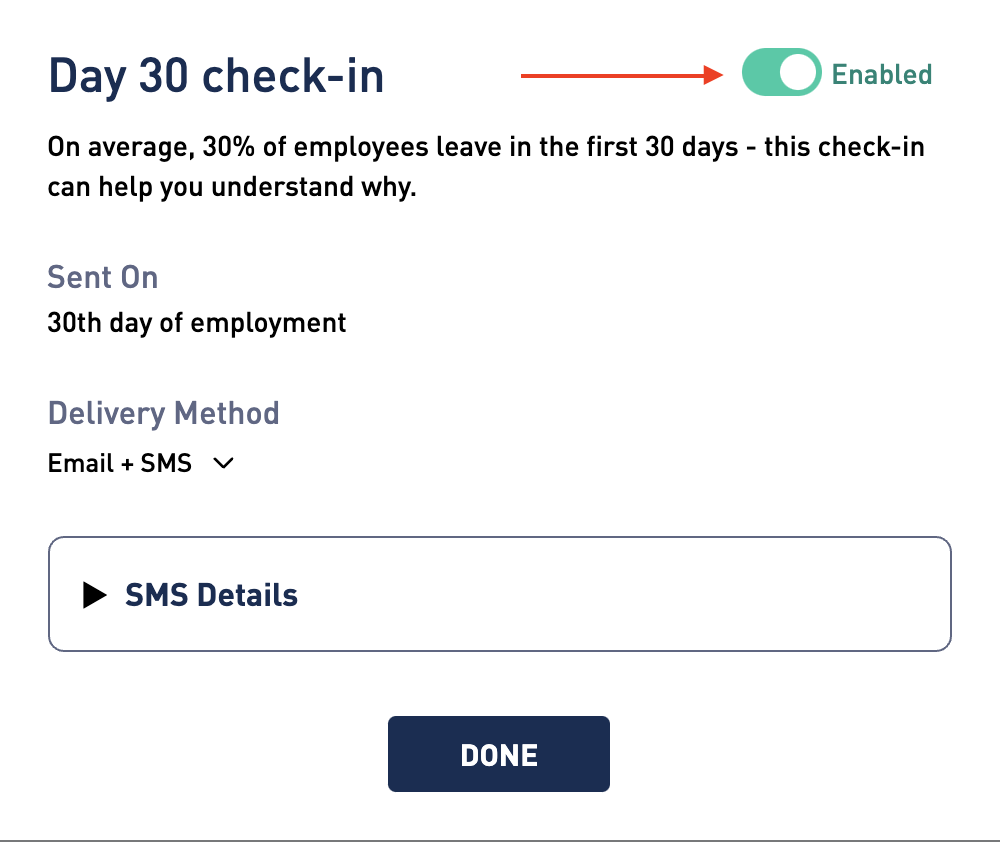
To enable or disable a check-in, select the "Edit" button next to the check-in. Then select the toggle to enable or disable the check-in. Only users with the Admin permission level are able to enable or disable check-ins.
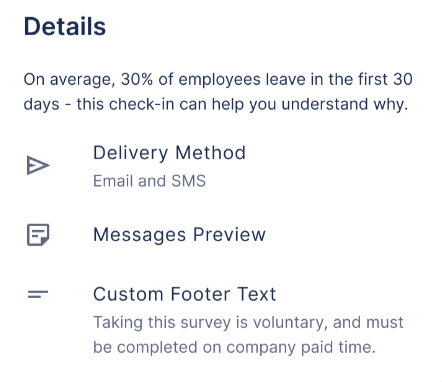
Details
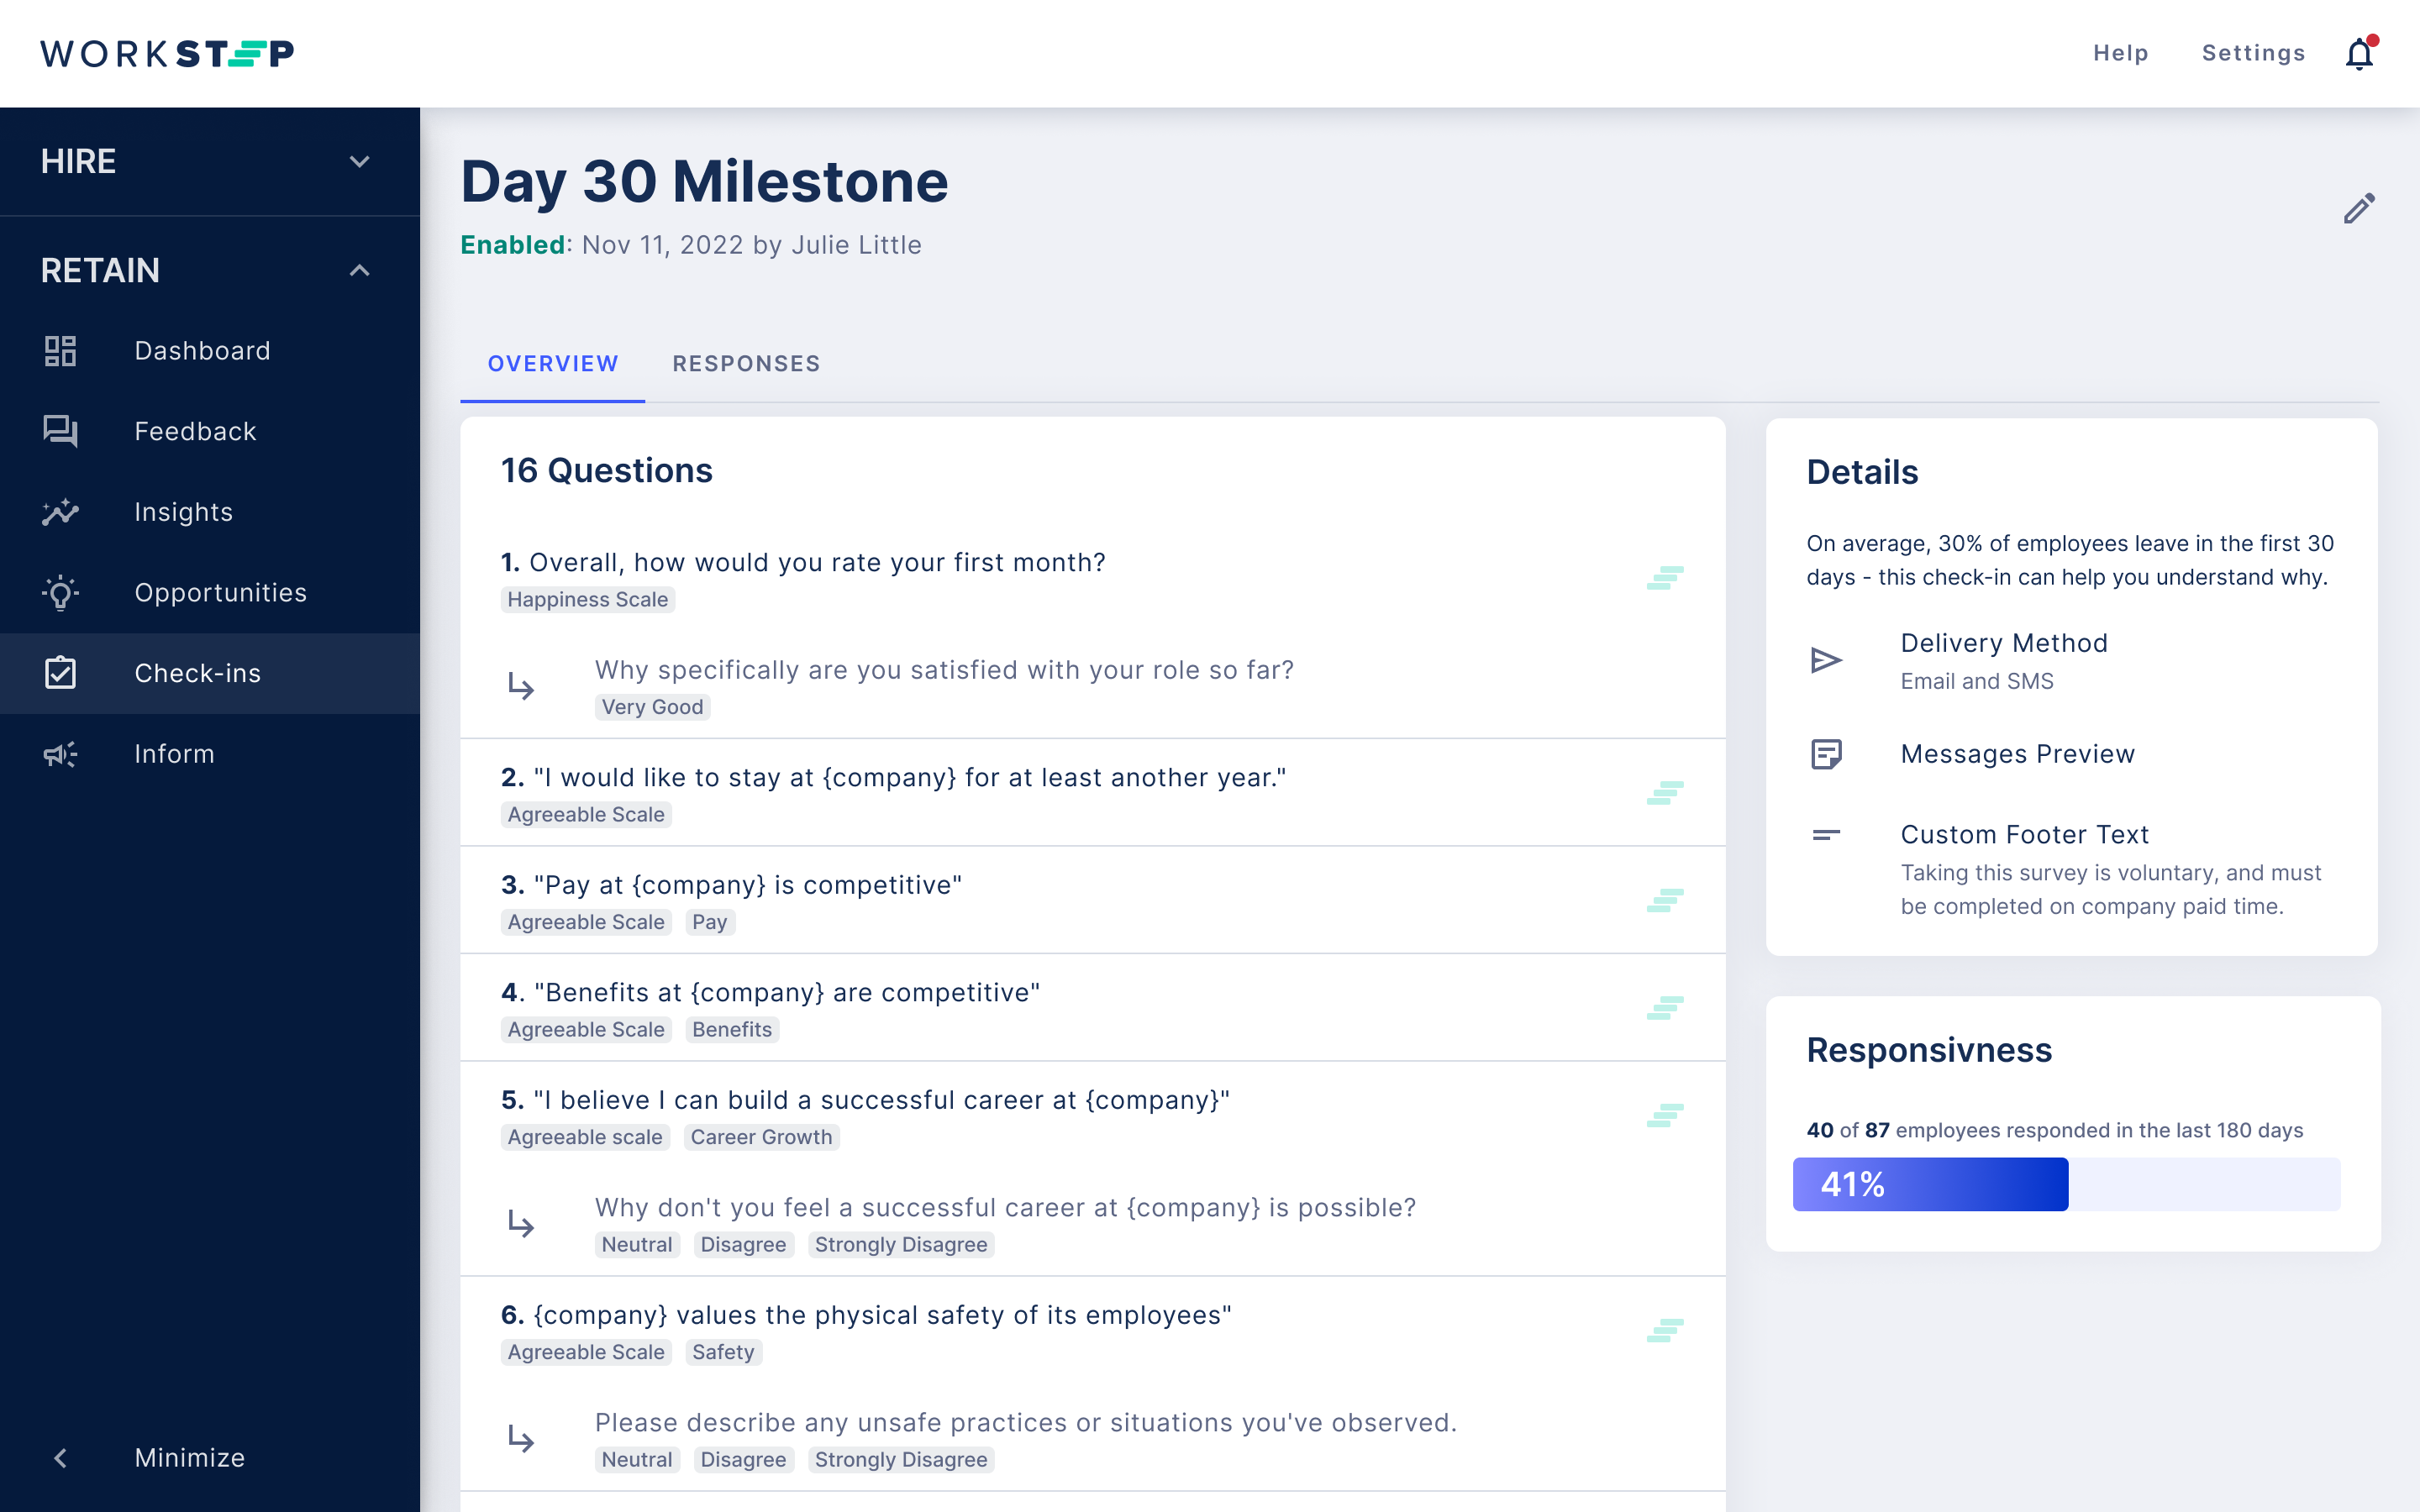
The Details card will provide further visibilty into a check-in's delivery method, preview of what the check in looks like via both SMS and email. The Custom Footer Text will also be available within the Details card if one exists. To find the new Details card simply navigate to the Check-in of your interest, the card will be located to the left of the question set.
Responsiveness Report Card
Located under the Details field you will be able to see the number of sends and responses you've had over the last 180 days for any enabled check-in. You can now track your check-in performance and see how it's performing. To find the new Responsiveness card simply navigate to the Check-in of your interest.
WorkStep Introduction Email
Once check-ins are enabled, newly added employees will be sent an introduction email from WorkStep letting them know they will begin to receive check-ins at key employment milestones. Check-ins will begin to be delivered to newly added employees according to their tenure after they've received the introduction email.
Open training sessions are available! Looking for some help getting started with WorkStep? In need of a refresher on best practices or feature functionality? Join us for one of our biweekly trainings by RSVPing here!